In this post, we’ll show you how to build a simple yet powerful admin panel for your MongoDB instance. Using MongoDB’s sample data, we’ll demonstrate how to query data, build tables and components, and use inline JavaScript to customize them—basically, everything you need in a great MongoDB client/admin panel/GUI with Retool (interested in other options? Check out our guide to best MongoDB GUIs).
Let’s dive in.
Reading data from MongoDB
Creating your new app in Retool (you can try Retool for free) will give you a blank canvas to which you can drag and drop UI components, set up queries, browse metadata for your queries, and much much more.
Let's drag a table to the canvas; it will pre-fill with JSON placeholder data.
To connect your MongoDB data, click on “Resources” > “Create a new resource”:

Hot tip: A simple Command +K will open Retool’s omnibox, which will help you find pretty much anything anywhere within your Retool app. Use it to pull up any resource ultra fast.
For more information check out our docs on connecting to MongoDB. Also, check out this walkthrough guide to help get your Atlas setup connected, and build a sample listing approval tool using Mongo's sample_airbnb dataset.
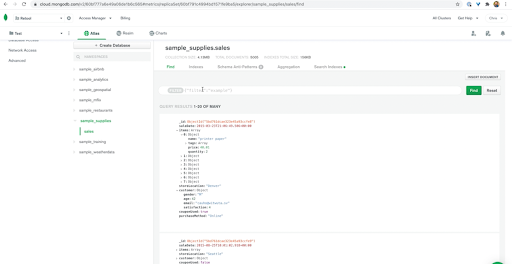
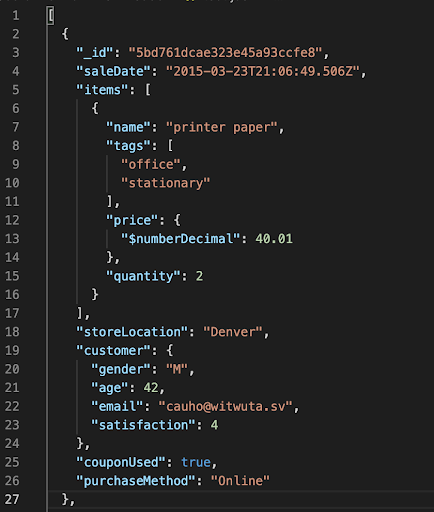
Back to our sample app: we connected to our MongoDB Atlas instance, where we’ve preloaded sample datasets that come with MongoDB. We’ll work with MongoDB’s “sales” sample set: it contains around 5000 sales orders, each including items like prices, quantities, customer information, whether a coupon was used, and when the order happened:
Let’s pull this data into our Retool UI. We’ll change the query to reference our MongoDB resource, rename the query to “listOrders'', use the “find” action on the “sales” collection, then run the query to return our sales order data. Dragging a table onto the UI panel will then automatically populate the table with data from our last saved query results, which will be our sales orders data.
Remember to save queries!
Retool doesn’t auto-save queries, so please remember to always save after editing a query.
Building a user interface to make best use of the data
Since there is a lot of data here, let’s set a limit to 100 orders/results at a time, then change the table to Compact mode which will make it easier to see the data.
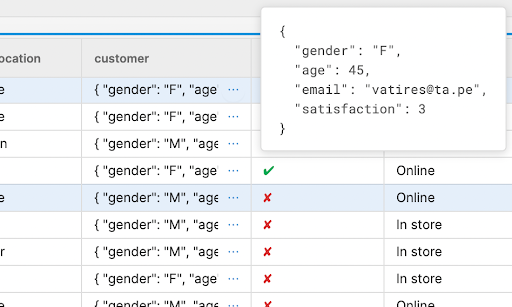
Retool lets you inspect data in each cell: in this case, customer data is a JSON object with properties like gender, age and email.
If we wanted to only display certain information in this column — say customer email — we can use JavaScript to reference the right cell and accomplish this. While we are at it, we can also update the column title on the fly.
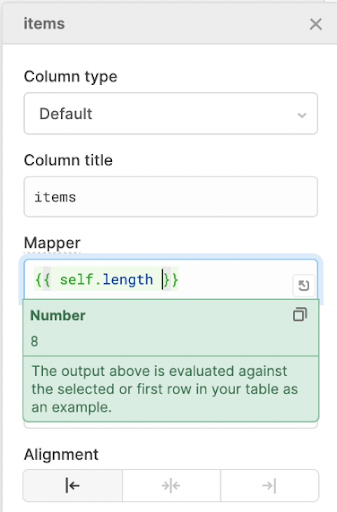
Similarly, rather than seeing all items in the “Items” column (which came as an array of JSON objects for each of the items in the order), we can choose to simply display the number of items in the order by using `{{self.length}}`

Taking advantage of Retool’s UI components: JSON explorer, containers, and more
With our MongoDB data in an admin panel, we want to maximize the usefulness of the interface so that we can navigate the order data better. A great way to do that is to separate individual data into different components.
Let’s say we wanted to have a better view into customer information. This is but one of many use cases for Retool’s JSON explorer component. We can put it in a nifty container, give it a name, change the background, and overall make it more user-friendly.
To see additional items in this order, let’s drag over another container with a table which we’ll call “Order items”. We can also put the price data in an easier-to-read format by overwriting the value in the cell with the value nested in the object. We do this by referencing `{{self.$numberDecimal}}`.

To make the table more readable, we can hide the tag column in the table itself—choosing to instead show tags in a multi-select component in the same container.
Retool offers many options for formatting tables, containers, and the overall dashboard. You can add other sophisticated text components, change background and font colors, use Markdown for table headers, etc.
Filtering items in MongoDB
If we wanted to search for a specific customer’s order, we’d want to add some simple filtering ability: type in a customer email and query MongoDB for records associated with this customer. We can do this by modifying our listOrders query by adding a sorting order and a query structure:
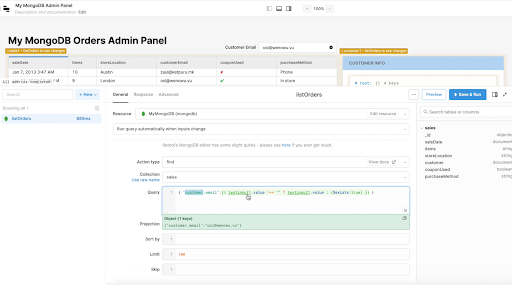
We then write some JavaScript using the ternary operator to quickly generate a dynamic query input based on if there is a value populated in the email text input field, `textinput1`. Additionally, we set the listOrders query dropdown to “Run query automatically when inputs change.” Now we have the ability to filter the table, but also scroll through the orders and easily see each individual one with its relevant data in designated components.
There is a lot more you can do
In this tutorial, we went through building a basic MongoDB GUI, with some simple components and actions. Hopefully, you’ve gleaned the customization capabilities with inline JavaScript, and some query manipulation. To see more, including creating, deleting, updating, and sorting items in MongoDB, check out this video:
And for some sophisticated use cases for Retool admin panels, watch our Lightning Demos series, including short demos from Coursera, Segment, and Neo4j.